"Papillon" is a Robert Tucker designed 'Fantasie 19' and my first boat.. I've been sailing since the age of 15 (when I did my RYA Part 1 and 2 at Emsworth Sailing School) so I've been on the water (but more in it) for going on 30+ years now... this blog is about our adventures together - they may be small one's (because despite the years I have little experience in boats - I was mostly windsurfing!), but they are adventures none the less..

Wednesday 23 March 2011

Launch day...

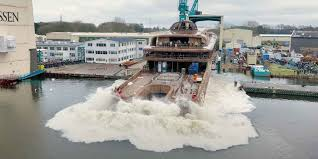
Good day all round on Tuesday as "Papillon" went back in the water with the least amount of fuss that I've ever had from her...

Rod the Mod came down to give me a hand with the mast - as you know I dropped it a couple of weeks ago so that my bro-in-law J, and I could easily check the electrics, and to take pressure off the side stays so that Jellybean Phil and I could do the GRP repairs to the join between deck and hull...

....with the arrival on the scene of the A frame this had been considerably easier than previous... this gave me the idea to do this years launch slightly more differently than on previous occasions, this time instead of towing her up the road to launch into Chichester Harbour from the public slipway in front of The Ship Inn pub, I'd do what the rest of the guys do and take a far more leisurely launch from the clubs own slipway into Langstone Harbour, with the mast down I could then go under the Hayling bridge to Chichester Harbour...

..and so it was - club has a much better slipway, quiet (the public one is in a car park which gets busy at pub opening time), no having to take your life in your hands on the main road to get to the pub slip, and I could take advantage of a later tide...

...Rod and I rigged the A frame before we went in the water, we then launched (took 15 minutes I think - just about time for half a cup of tea). Rod rowed the tender round, while I motored under the bridge - it was a close run thing by the way - with the A frame up there was practically no clearance at all due to the height of the tide, and she scraped the bottom of the bridge twice. Not a worry though as the frame was about a foot higher than the end of my mast in the crutch hanging over the back which was far more important...

...safely over the other side I then moved an interloper off my mooring (someone had been sent there in error so I had to move them to the correct mooring), and Rod and I slipped the mast up in what must have been the most relaxed and easy way I've come across... lessons....
  1. I used the mainsheet which only gives 4:1, but is plenty for a mast of my size (approx. 22')
  2. the mainsheet wasn't long enough but I put in an extra piece of line from the end of the sheet to the top of the frame to make up the difference - that way the mainsheet will always be long enough...
  3. I used the jib halyard as the lifting rope - I was in two minds as to whether I should have used the forestay itself (which has a roller furling foil on it - I guess I'm still in two minds
  4. When I lifted the last the foil ended up being inside the arc of the frame and required a bit of juggling to get it out so that I could swing it round the front of the frame for attaching... if I use the jib sheet again then I need to remember to lay the foil outside of the frame
  5. I used a spring clip luggage strap to put enough tension on the jib sheet to keep the mast up, while I disconnected the A frame and reconnected the jib forestay, I don't have winches so this is a tried and tested method for me...
  6. Put the furler on back to front again.. happily I spotted it this time!

...and that was largely it - we made an offering to Neptune followed by an offering to the boat, and then the two thirsty crew finished off the bottle!

Only downside of the whole day is that the fix I did to the side of the tender is not water-tight and leaked... looks like I need to put another coat of epoxy on, or find something I can do a bodge with so that I can focus on enjoying the boat!

...and here she is - where she's supposed to be again - looking forward to the new season immensely...


Tuesday 22 March 2011

She's in....

...and back on the mooring - thanks to Rod the Mod for his assistance...

PS. Piccies later....
PPS. A-frame worked an absolute treat....

Sunday 20 March 2011

All done....

All done.... but for the record...

  1. My mother-in-law has offered to sew me up some new cushions for the cabin to replace the current one's which I think must be original... going to settle for one and do the rest next year!
    1. Find the material - needs to be waterproof'ish but sew-able
    2. Find the foam - this stuff is priced like gold dust.. more web research is required!

    I binned this idea - I simply didn't have the time - having done all the structural jobs now though (standing/running rigging and the GRP reinforcement), that will give me some time next winter - so maybe then...

  2. New s/s shackle for where the bottom of the cunningham (down-haul to us unrepentant windsurfing types!) connects to the bottom of the mast - currently a nasty galvanised job - done
  3. New s/s shackle for the top of the jib where it connects to the roller furling foil - currently a very small shackle with split pin - not up to the job - done
  4. Small plastic eye to whip into the end of the new topping lift - done
  5. Replace/renew topping lift - done
  6. Replace/renew jib halyard - all done here
  7. Rip out old cabin lining below the shelving - take back to GRP, prime and paint - extend the paint into the quarter berths, and forward as required.

    All done - from this...
    To this...

    Now that looks a bit better! dog products

  8. Investigate cabin lining forward to see if I can make an interim repair that's neater than fourteen strips of gaffer tape!

    See previous - no way to do it neatly so ripped it all out and gave it three coats of white bathroom emulsion..
  9. Re-splice rope to anchor for main anchor - looking worn and slightly frayed..
    Not done.. yet.... I'll do this when I'm on the water this summer.
  10. Finish off the electrical connections for masthead and deck light that I put back together earlier in the summer but haven't tested - need to confirm positive - done
  11. Rub back and refresh the varnish down below, and on the washboards - do this after the painting
    Not done.. ran out of time...
  12. Build "A" frame for easier mast lowering and raising - two bits of three by three, hinged with an eye bolt, and with a big lump of pulley and tackle should make raising and lowering the mast a whole lot easier - and may mean I can take advantage of the club lift in rather than having to trundle the trailer along the road.. this is not a high priority item - the advantage is it can be built at home in spare time.
    All done here
  13. Replace bolts holding tiller - not stainless steel and beginning to rust - all done
  14. Replace nuts & bolts for the sliding hatch with s/s; currently galvanised and beginning to rust - all done
  15. Remove old (and now defunct) solar panel from back of boat - done - and yesterday I glassed over the old screw holes to make the hatch water tight..
  16. Clean bottom of boat and remove old marine growth/mud etc.
    all done here
  17. Anti-foul: All done yesterday - two coats and looking very smart!


  18. Repair deck by port shrounds

    This was the one I was most happiest with - huge amounts of thanks to Jellybean Phil for starting me off - background is that it looked like the deck was lifting slightly by the port side shrouds. Three layers of epoxy, and a coat of white emulsion later and I have piece of mind and a new skill under my belt... I can now glass fibre (well kind of dog products)!

  19. Outboard service - done
  20. Treat the bottom of the wing keels with Hammerite
    All done here
  21. Fix leaking windows - hmm - all done but there's still abit of a drip! dog products

Saturday 12 March 2011

Lights, camera, action...

We are really picking up the pace now - but look at that countdown clock ticking away!

So over the last couple of days, but mostly today, the mast lights have all been cleaned, checked, and put back together.. so that's job # 10 done. Being a perfectionist I also checked all the deck lights... just as well I did....

So Papillon has the following lights:
  • A forward combined port and starboard light - see top left - this is pop riveted to a metal plate attached to the pulpit - not working. When we opened it up this was in a hideous state inside, corroded, never going to work. I decided to cut my losses and save the time rewiring the light unit and just buy a new unit... I went for a bog standard one and got it for just over a tenner. We needed a new mounting plate (new one was bigger) but more irritatingly the wiring for this light was very brittle/fragile. The wire is protected/tidied by feeding it up the inside of the pulpit, through the deck underneath one of the supports - suffice to say this wire was stuck solid (looked like sikaflex sealant used to seal the bolts when the pulpit as was attached had also stuck the wire). So I had to take out the two bolts, lift the foot, free the wire, feed through 6", test the voltage (OK), and today we wired up the new light and replaced the two bolts and a seal of fresh sikaflex. Now working but what a faff..
  • Rear white deck level nav light - working.
  • Combined deck light and steaming light halfway up the mast...
    1. Deck light - working
    2. Steaming light - not working, Looks like I'd rewired the plug wrong, a quick adjust got that going again.
  • Mast head combined tricolour and anchor light.. like this..
    Neither of them was working, and originally I thought it was the bulbs as I checked them but couldn't get a glimmer from them using the car battery. Took them into SeaTeach (my local chandler) this morning to get some new ones, but the owner talked himself out of a sale by cleaning the bulb contacts which had become corroded, testing them with a voltmeter, and sending me on my way - what a great bunch they are, always been helpful to me - recommended! So, holder cleaned, plug re-wired, bulbs put back in - all working again.

    Bizarre bulbs by the way - they have an offset pin - they're also 24v bulbs - no idea why! They light up - but they're not exactly the brightest! By the way, those bulbs are a tenner each to buy new!!!!!!!
So out of 6 lights - only two were working... and I still have absolutely no idea why the previous owners fitted so many...

In the UK we have regulations that if you sail at night, then depending on whether your under power (the trusty o/b in my case) or sail, you use different combinations of lights so that another ship will always know what you're doing - the following helps explain my confusion...

So call them columns A, B, C & D going left to right....
  1. Column A doesn't apply as my deck level lights are front and rear, and in the case of the front, combined...
  2. For the same reason the power option in C doesn't apply...
  3. Column D doesn't apply - my deck level nav lights are wired together - when I flick a single switch both come on so I can ignore that one...
  4. Column B is my preferred option - just flick the deck level nav lights on, and add the steaming light if I'm under power - easy - but why also install the mast head tricolour?!
  5. Well you could use it for the sail option in C, but why when you have the alternative option in B?
So she's got too many lights to maintain.... and here's the kicker, Papillon is 19' feet long, that's less than 7 metres, and those regulations above are for boats of less than 12 metres - boats of 7 metres or less doesn't require any navigation lights at all other than a torch!!

"Sailing vessels less than 7 meters may carry an electric torch or lighted lantern showing a white light to be displayed in sufficient time to prevent collision. If practicable, the lights prescribed for sailing vessels less than 20 meters should be displayed."

Ah well... someone define "practicable" to me.. dog products

While doing that I also finished off the windows... another one bites the dust.

Tuesday 8 March 2011

A-frame & more work done...

VERY busy Sunday this week...

With a little time on my hands, and as a result of finding myself in B&Q last weekend with access to some wood, I had knocked up a simple A frame last weekend (job # 12 done!) and was surprised how quickly I managed to put it together, and how cheap it was...

Two seven foot lengths of 2" x 3" set me back a fiver (they were on special), a couple of 10mm eye bolts was the same - drill the two lengths of wood about a couple of inches from the end and bolt them together with the eye bolt and a couple of washers to protect the wood.

On "Papillon", the seven foot length was perfect, as it reached from the anchor point on the side deck to the anchor roller perfectly...

I threaded a couple of 8mm ropes through the holes in the other ends and tied the ends of the frames relatively tightly to some cleats I have on the side deck just in front of the stays - on the Jouster we used a stanchion in much the same position. This gives an anchored pivot point for the frame..

Lay the frame flat on the deck with the eye bolt eye facing downwards and just above the bow roller..

Attach the main sheet, or handy billy, that you are using to provide the lifting - one end to the eye bolt, the other end to the bow roller. Then take either the forestay (which on Papillon has a roller foil), or jib sheet, and attach that to the eye bolt as well) - that then provides continuous linkage between foredeck and mast - with the frame providing the fulcrum, and a lever, in the middle.

If you decide to use the forestay have someone brace the mast while you connect or disconnect it to attach it to the frame - alternatively - use the jib sheet to provide a temporary forestay while you do it (or do as I did, and do both!)

Frame in operation...

After that it was just a matter of pulling or easing out the ropes you use to provide the leverage - mainsheet, or handy billy.

We started off by using it to raise the mast on my neighbours boat which is a Westerly Jouster - you may remember that we weren't too successful lowering this at the end of last season [click here] but suffice to say it was a far better raising than it was a lowering..! His boat is bigger than mine so it was a good test of the frame.

He used his main-sheet for the leverage, and because the mast was down we used his fore-stay as the lifting point. The mainsheet gave 4 to 1 leverage, and that was only just enough as the owner said he would have preferred a little more leverage as he couldn't have pulled any harder.

We then swapped to my boat so that I could lower the mast - and did exactly the same in reverse... job done - very, very, pleased how easy it was to do, and this means that I can now realistically launch from the club side of the bridge, motor under the bridge, and then put the mast up when on my mooring... it also means I'm not tied to quiet times in the pub car park - any weekday with a half decent tide will do.. much much less stressful!

So - why take the mast down?? Basically, I have two pieces of work I'd like/need to do before I can launch, one of them is easier to do with the mast down, and one them needs it down...

First job needs it down, and that's to complete the checks to get all the lights working (job #10 on the list); bro-in-law came over last weekend and we tried them out - only the deck light is working so that leaves the steaming light, masthead port/starboard, and anchor light to get going. I'll check the bulbs this Friday, but he's coming over again on Saturday morning as we might need to do some re-wiring...

Second job is the glass-fibre'ing I need to do for job #18.. having the mast down takes pressure off the shrouds and makes it easier to crank the deck down on the hull... I'm going to take a half day this week to go and pick up the necessary supplies...

Elswehere,
  • the outboard has been serviced (#19 done)
  • I started work on the windows (#21) - half done, will finish them this weekend...
  • I'm also going to find some material to replace the curtains (#1 morphed into that)...
  • SWMBO has advised me that she is going to steam clean the existing cushions - Heaven knows they need it!


Phew... be pleased when I'm done....